Showing posts with label carpentry tricks and tips. Show all posts

Wednesday, January 28, 2015

Carpentry Tricks and Tips - 10 Of The Greatest Carpentry Tricks You Will Find

Here’s Some More Of Those Great Carpentry Tricks and Tips I Found Over At The Home Handyman Site.


Strings and Stakes Work Sometimes


Strings and stakes work sometimes, but there is another way to maintain layout control for small project areas


When we used to build garbage enclosures for our commercial projects, after the gate post and bollard holes were dug, the easiest way to control the gate post, corner post and bollard post layout for the concrete pour was to build a layout template on the ground. All these posts could be set to elevation, and braced plumb before the concrete truck arrived.


Here’s a similar setup in a residential. situation.
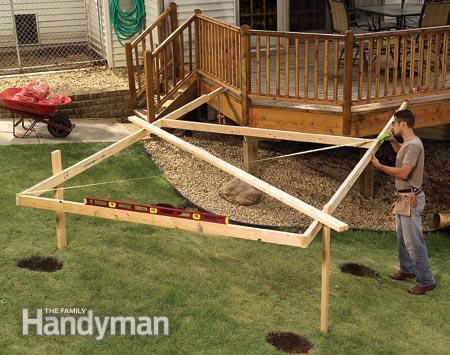

How to build a template to control a work area.


Image Source


“Use the construction lumber as a template


You see it in print and on TV everywhere—some stake and board contraption set up to hold strings to help position postholes, or lay out footings or building footprints. But most of the time, there’s a much better way. Tack together the construction lumber to outline the structure, square it up and use it as a giant template to do all your marking. Set it aside to do your digging and replace it to set the posts.”


Setup A Job Site Work Station


Things can go a lot smother and faster if you have some kind of jobsite workstation set up around your miter saw and table saw.


I have a couple of sets of stackable saw horses dedicated for this purpose. You can usually find plywood or 2x material on site to make a table top.
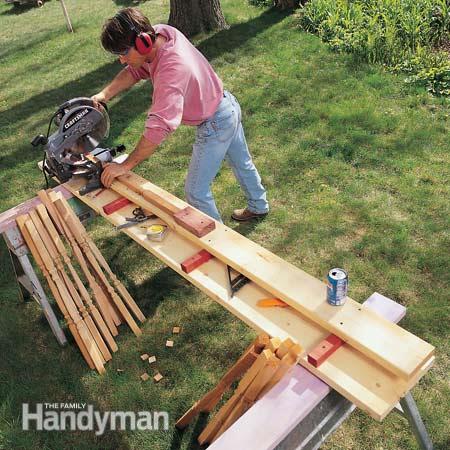

Here are some miter saw bench ideas for your jobsite setup


Image Source


“Use materials on hand for this simple bench


Whether you’re working in your garage, out in the backyard building a shed or up at the in-laws’ cabin building a deck, take a few minutes and cobble together a miter saw bench, With a little creativity, you can use just about any materials you have on hand. The only custom work you’ll need to do is to rip some spacer boards to make the outfeed support the same height as the saw table. It sure beats kneeling on the grass or perching the miter saw on horses. And the bench does double duty as a super-convenient work surface too.”


The Toenail Trick


No we’re not talking about kicking your lumber pieces in place.


Driving a toenail into a lumber joint is a great way to straiten a member or move it sideways into the correct place.
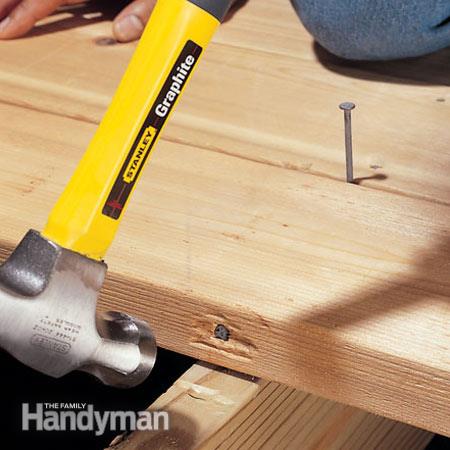

The toenail trick to position lumber accurately


Image Source


“Use the toenail trick to position lumber


On my first job as a framing carpenter, I was beating on a stud to try to coax it into position. The stud just bounced back. A veteran framing carpenter walked over and drove a big nail at an angle through the edge of the stud. The last two hammer blows moved the stud into position, where it stayed. Now I use the toenail trick whenever I need to adjust stubborn lumber.”


The Easy Way To Order Framing Materials


This is a simple formula for figuring out how much framing material to buy for your walls.
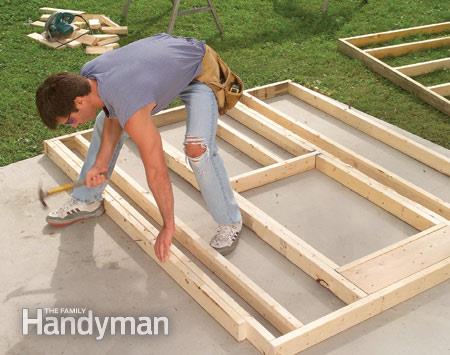

This framing material formula makes it easy to estimate framing material and order framing materials


Image Source


“Use this formula to order framing materials


 You don’t need a math degree to estimate framing materials for walls. Here’s a formula that works every time, no matter how many doors, windows or corners your walls have:


  • One stud per linear foot of wall.

  • Five linear feet of plate material (bottoms, tops and ties) per linear foot of wall. It’ll look like too much lumber when it arrives, but you’ll need the extra stuff for corners, window and door frames, blocking and braces. Set aside the crooked stuff for short pieces.


Learn more great construction tricks and tips at the source article. click here


Did you read the first post in this series of great carpentry tricks? – Click Here --


Carpentry Tricks and Tips - 10 Of The Greatest Carpentry Tricks You Will Find

Carpentry Tips and Tricks - 10 Of The Greatest Tips You Will Find

These Carpentry Tips and Tricks Are Going To Make Your Projects Go Easier And Faster.


I came across this article at The Family Handyman and I have to agree that these 10 construction tips and tricks are well wort knowing.


If you are in the trade they will make you money and you DIYers will save a lot of time.


So lets take a look at my favorite 4 for starters:


Finish Carpentry Tip


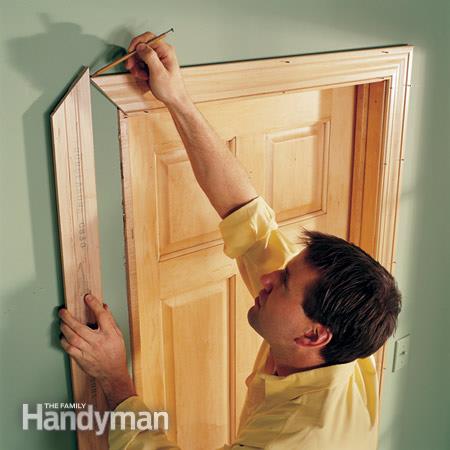
This first one is a favorite because it is not only fast and accurate but it saves you from the embarrassment of incorrect measuring and layout.


Finish Carpentry tips and tricks for measuring


image source


The advice is to not use your tape unless you have to.


“Holding trim in place and marking it is always more accurate than measuring, often faster and it eliminates mistakes. This is good advice for other types of carpentry work too, like siding, laying shingles and sometimes even framing.”


Use Nippers To Pull Nails


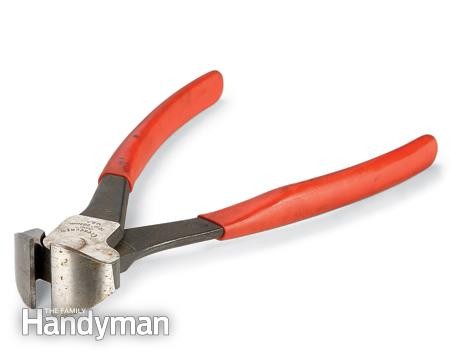
The right tool for the right job. Demo work often means saving trim pieces to be reused later. If you drive the nails back out, you end up with an ugly surface blemish. Besides 18 gauge brad nails are near impossible to drive back. If you use the tools at hand you often end up just cutting the nail off while trying to pull it. Those little nail stubs sticking out are a danger for scratching yourself as well as marring other pieces in the save pile, not to mention a hazard to your saw blades later when you go to cut the piece to a new length. Here’s the tool to use.


use nipper pliers to pull nails from trim boards


Image Source


Keep a pair of ‘nippers’ in your pouch whenever you’re doing trim carpentry. When you pull trim from the wall, use them for pulling the nails through the back of the trim


Buy A Trim Gun


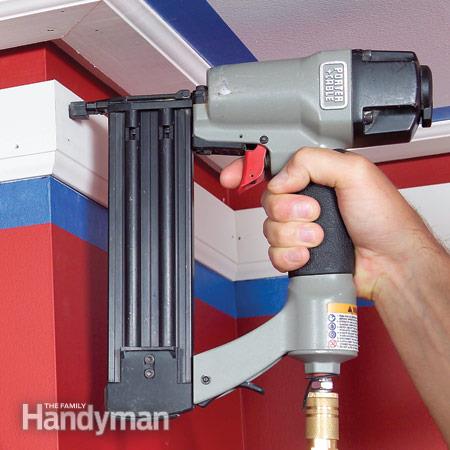
For beginners this power tool should be on your top 10 list. If your not sure rent one for your next trim project and I’ll guarantee You’ll own one befor the next project.


The Brad Nail Gun - In The Top 10 Tolls To Buy List


Image Source


I haven’t hand-nailed a piece of interior trim in 25 years. Why? Because air-powered trim guns make the results so much faster, better and neater. No splits, no predrilling, no knocking the piece out of place as you hammer, and only itty-bitty holes to fill. The gun I paid $300 for back then can now be had for $125— and it’s better than the old one! If you’re going to buy just one size, the most versatile choice is one that shoots 5/8- to 2-inch 18-gauge brads.”


Practice Your Miters Before The Final Cut


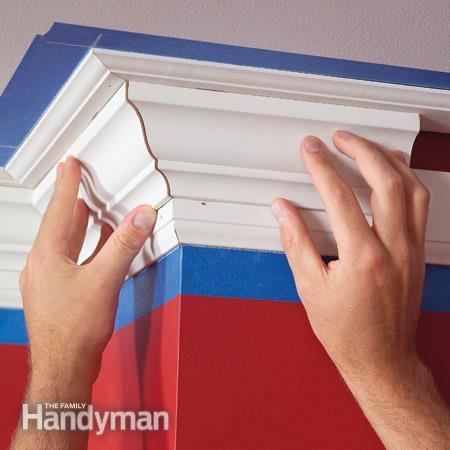
Before nailing that piece of trim solid check the joint at the other end with a piece of scrap. You’ll be amazed what you’ll find some times. I sure wish they could build walls perfect.


One of the best finish carpentry tricks and tips to use


Image Source


“Practice on test pieces for the perfect miter


Fine-tuning a miter for a perfect fit is often a trial-and-error process. Practice on smaller test pieces until you get your miter saw set to exactly the right angle, then cut the actual parts.”


For more great tips head on over to the original article.

Read more: http://www.familyhandyman.com/carpentry/the-best-carpentry-tips-and-advice/view-all#ixzz3Q9B20uWn


Carpentry Tips and Tricks - 10 Of The Greatest Tips You Will Find