Tuesday, March 31, 2015

How To Size Your Lumber To Get 4 Square Edges

Having Square Edges On Your Boards Sure Makes Woodworking A Heck Of A Lot Easier.


Do you know the best way to get those perfectly square edges?


In this video you will be shown how to do just that.


Starting with getting one edge perfectly straight and working from there to get the opposite edge parallel and the edges jointed square.


Discover the tricks to doing that in this video.


https://www.youtube.com/watch?v=HQ8wT6Z6pQQ


How To Size Your Lumber To Get 4 Square Edges

Do You Know The Lumber Grades?

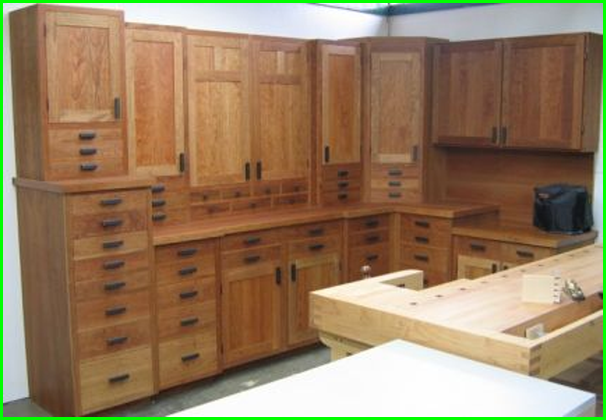
If A Certain Type Of Lumber Seams Cheap – Be Careful What Grade You Are Buying


Low grade lumber is cheap because in is low quality. Out of a long wide board you may only get a few short pieces suitable for a quality project.


At the saw mill they separate all the boards cut into the different grades.


You can seldom buy the highest grade at the store, it is reserved for various manufacturers or most often for export.


Middle grades are commonly available at any lumber yard and the lowest grades go to pallet manufactures or for some types of fence boards.


There are different grading standards for different species of wood. As well as different grading systems for hardwoods and softwoods.


Here are some of the species grades that are common.


Western Lumber


Known for its ease of workmanship and nailing as well as strength and dimensional stability, Western lumber includes more than 15 commercially important Western softwood species. The most common species are Douglas fir and Hem-fir. This can be classified as High Quality Appearance, General Purpose Board or Radius-Edged Patio Decking Grade. The Western Wood Products Association (WWPA) has a rigorous inspection and quality control process. Lumber with the WWPA logo indicates the lumber has passed that quality control process. Lumber with only the “WWPA Rules” stamp indicates the lumber has been graded according to the WWPA rules, but not been inspected by WWPA.


Use this for basic building projects and framing.


Southern Pine


Southern pine has high strength, resistance to wear and holds fasteners well. It is often used in homes and other structures. Descriptions for this type of wood range from 1 through 4.


  • No. 1 has the highest quality and best appearance

  • No. 2 is characterized by tight knots and is generally free of holes

  • No. 3 is good, serviceable sheathing, usable for many applications without waste

  • No. 4 contains usable portions at least 24 inches long


Pine Shelving


This lumber is 1 inch thick and of varying widths and lengths. Most consumer inventories range from 1×1-inch to 1×12-inch, up to 12 feet long. From 1×1 to 1×6, increments increase by 1 inch. Then, lengths increase in 2 inch increments from 1×8 to 1×10 and 1x 12. Most consumer sales will be in 4 and 6-foot lengths. No. 4 grade pine is commonly called “garage shelving.” Many people use it for basements and garages where looks are not important.


Back at the original article you’ll find info on redwood and treated lumber as well


Image Source


Go to the next page to understand hardwood ordering — watch the video


Next Page »


If you use hardwood you need to know this.


The knowledge you will gain in this video could save you a lot of time and money.


https://www.youtube.com/watch?v=-1H2I36Q8lI


This next video shows you how to select construction grade lumber.


Next Page »


Here are some tips for selecting construction grade lumber


Most lumber yards will let you do a little sorting to get some better quality boards.


Don’t try this when the yard is real busy, because the yard hands can’t waste their time with you if a lot of other customers are waiting. Often they will be happy to go serve another customer and come back to you to check te board count. And make sure you don’t mess up their lumber piles in the process.


Here is a video to show you what to look for.


https://www.youtube.com/watch?v=SNUpM_vgg_s


Do You Know The Lumber Grades?

Get Top Efficiency From Your Air Conditioning

All It Takes Is To Know What To Look For


A little yearly maintenance and preventative maintenance can go a long way to keeping you cool this summer.


And if you find something wrong it’s better to call early in the season so you won’t have to wait in line.


Here’s a video to show you what to look for.


https://www.youtube.com/watch?v=SEVx7ByV9Rg


Get Top Efficiency From Your Air Conditioning

Sunday, March 29, 2015

How to install Asphalt Shingles

This Is One Of The Easiest DIY Projects If You Don’t Mind Heights.


A straight gable roof such as a garage is an easy project to tackle.


If you live up north you will want to start with a 3′ strip of snow and ice shield at the eave. I also like running a metal drip edge along the bottom and up the gables. They give you something to tuck your aluminum fascia behind as well as a little more support for the shingles at he edge.


https://www.youtube.com/watch?v=tc7kzMUce0k


Here’s another Bob Vila roofing video.


Next Page »


Here’s a different roof using a different shingle


I would have run the tar paper over the drip edge at the bottom, but on this roof slope your not likely to get any water running under the shingles on the tar paper so maybe it doesn’t mater.


There are some special features for this roof you’ll want to see.


https://www.youtube.com/watch?v=oCtNYJ3geww&spfreload=1


How to install Asphalt Shingles

How To Remove Crayon Stains On Walls

Aren’t Kids Wonderful Except When They Do Something Like This…


Crayon stains on walls can be difficult to get rid of.


New paint doesn’t stick properly to the crayon mark or the color can bleed through.


Here’s a short video that shows you how to get those walls looking like new again.


https://www.youtube.com/watch?v=UfR9_ilKVxk


How To Remove Crayon Stains On Walls

Kitchen Cabinet - Complete Install - Less Than A Day

These Guys Know What They Are Doing


When you are organized and know what you are doing, then an install can go as quick as you’ll see in this video.


You can get a lot of tips from this video. Where to start, predrilling  hole in all the right places for quick assembly and how they make sure everything is level and aligned. Even the tricks for getting that perfect look at nhe end.


https://www.youtube.com/watch?v=kJyqV-ZBeYo


Kitchen Cabinet - Complete Install - Less Than A Day

Rabbit Hutches With Style

How many rabbits do you know who live in an A-frame rabbit hutch


Here is a safe sturdy and predator proof rabbit hutch setup.


These cages are also lightweight and easy to move if necessary.


Other people have used them for other small animals and birds as well.


Here’s what the builder has to say about these hutches.


rabbit hutch


When I got my first three rabbits, they were living in rarely cleaned, solid-floored cages. One of my rabbits had sore hocks. Within two weeks of living in the wire cage, her condition cleared up. My rabbits are mini rexes, which means that their feet are more susceptible to sore hocks. Even so, none of my rabbits have sore hocks anymore since I put them in the wire cages.


I always provide my rabbits a choice between the hay-covered floor and the open wire. I find that on warm days, I find almost all of them sitting in the run.


And, since I got a comment about it, I would also like to clarify: my rabbits are not for meat. They are pets and show rabbits. And I love pampering them. Most days, you’ll see me bring a rabbit from the outdoor hutch and into the house until it has to use the bathroom. And then I’ll put it back.


Back at the original article you get the detailed construction steps and more images.


Image source.


Rabbit Hutches With Style

Amazing Carved Wooden Vases Ron Layport Makes

Most Of The Good Items At Gift Shops Are Great But Nothing As Detailed As These Vases


It all start by turning the vase on a lathe. But that’s just the beginning for Ron Layport.


He carves them, pierces them, sands them and polishes them. Keeps working on them till he as perfected one of his many animal oc nature motifs.


Dragon Fly Vase


Image Source


See Another Vase on Pg 2


Next Page »


This Beautiful Vase Depicts A Ram


Ram Vase


Image Source


See the next gorgeous vase


Next Page »


Birds In The Thicket


Birds In The Thicket


Image Source


And one more on Pg 4


Next Page »


Here Is His Pierced Dragonfly Vase


Dragon Flies


Image Source


For more commentary and more images go to the original post


Amazing Carved Wooden Vases Ron Layport Makes

Saturday, March 28, 2015

Need A WiFi Boost

Here Is A Sailors Trick To Get A Better WiFi Signal From Shore.


It’s called a cantenna. Its a super easy antenna you can make. It’s very directional so you’ll need to point it at the WiFi source. Once set up you’ll be able to use all your WiFi devices.


Build your own directional antenna


To play with wifi antennas you must have an wifi hub which connects to external antennas (ie not just to the built-in antenna). Your antenna will have a normal N type coaxial plug to which you will connect the coax cable running down to the hub. It will also be the place you solder the radiating element. You will need an adapter cable (“Pig Tail”) runs from the wifi hub to the coax connector on the antenna. One end is the N type coax and the other matches the RP-SMA connector on the hub. You will want some way of mounting the antenna high in the boat but within reach for aiming. I used a camera mount which has multiple clamps and a big suction cup. The connector at the hub can be different if you use other than the alfa hub. Freeman Anderson and Bird give good close-up pictures of the various connector types. I just bought the whole pig tail and cable from them which they describe as a “cantenna kit” for less than $20. Click here for details.. My hub connects to the computer with a normal usb cable . The hub requires no external power source but this antenna will work with powered wifi hubs for increased power and probably longer cable runs


Building the Cantenna:


Basically the antenna is a kind of wave guide. You empty a tin can of a reasonable size. 3 or 4 inches across and as long as possible. We used an old fruit juice can. You cut off one end and clean the can. A coax connector is mounted on the side of the can and a very short radiating element is soldered on the inside of the connector extending about half way into the can. Exact location and element length for a given can are derived by a formula givenhere


I mounted a piece of aluminum angle bracket on the base of the can to allow for mounting a clamp and giving me the ability to point and rotate the can because I can never convince Susie to just stand there holding the can while I browse the net. Most women are funny that way. Trust me on this.


read more on the source article       image source


Here is the video showing how it’s done.


https://www.youtube.com/watch?v=ZHdiEPZ2OGk


Need A WiFi Boost

Geothermal Geyser - An Artistic Formation Of Minerals And Water

A farmer started drilling a well for geothermal water and ended up something totally awesome…


The Fly Geyser is located in the Black Desert in northern Nevada.


It’s an awesome sight when you see it for the first time. And it’s not totally natural. If that farmer hadn’t drilled a well there no one would have ever suspected that such beauty could have resulted


This is a great video shot with a DJI Phantom 2 with H3-3D gimbal and a GoPro Hero 3 camera. Have a look.


https://vimeo.com/107168720


On the next page you can take the guided tour.


Next Page »


A Geothermal Geyser Out In The Middle Of Nowhere


All that color you see are living algae. Without the constant water on them they would die and the color bright colors would disappear.


The geyser now covers over 74 acres of desert has 30 or more pools of water on several different terraced levels.


This video will give you the guided tour.


https://www.youtube.com/watch?t=241&v=_GXF_iVPRBU


 For more beautiful images of the geyser go here


Geothermal Geyser - An Artistic Formation Of Minerals And Water

Friday, March 27, 2015

Top 10 YouTube Woodworking Channels

If You Are A Woodworker Like Me You Probably Subscribe To Some Of These Channels Already


Are you looking for great ideas and how to videos then you should be subscribed to these channels.


I left out the corporate and magazine channels. These are regular woodworkers who make videos about the interesting projects they tackle.


Now ere are the top 5


1


2


3


4


5


Click over to the next page to see channels 6 to 10.


Next Page »


Here Are The Next Top Channels – Channels 6 to 10


These guys do some great videos as well.


I often feature them on my blog and Facebook page.


6


7


8


9


10


The inspiration for this post came from a post over at the Drunken Woodworker  site where you can find 10 more channels – the top 20 channels


The channel images came from the Drunken Woodworker site as well


Top 10 YouTube Woodworking Channels

Before They Had Canons Trebuchets Won The Battle

Building Model Trebuchets Is A Fun Project Kids Love To Do


A trebuchet is capable of throwing huge weight a long distance. Castle walls didn’t stand much of a chance if the attackers were allowed to get these machines in operation.


Today these machines are great to model and play with.


Building Model Trebuchets


First up is a school class project and the we’ll see some big kid’s toys.


https://www.youtube.com/watch?v=Cm-AZSkzdxo


It’s amazing to see  the accuracy they can get. Watch the video on the next page.


Next Page »


Here’s one of those big kids toys.


After just a few tries they manage to hit the target dead center.


I never would have thought that these machines were capable of such accuracy.


No wonder if your castle was under siege, one of these machines would determine the  outcome.


Take a look at this big kid toy.


https://www.youtube.com/watch?v=L1EAA7pkEJ4


On the next page you’ll see a really big one in action.


Next Page »


Now this is quite a machine.


Who would have guessed the origins of the hamster wheel.


I never would have thought that those wheels would be capable of getting the leverage to pull the arm in place, someone was pretty ingenious.


The largest siege engine in the world at 22 tons have a look.


https://www.youtube.com/watch?v=RN18I-RBVm4


Before They Had Canons Trebuchets Won The Battle

How To Make A 28" Wide Thickness Sander

A Thickness Sander Is An Awesome Tool To Own


This article links to a really detailed set of instructions on how to make the machine shown in the picture.


I use my small commercial sander mostly for a final smoothing pass to get rid of the marks that my planner leaves in wood pieces. That saves a lot of hand sanding.


Occasionally I use it to flatten and thickness wide boards. It works but can be a slow process.


A machine like this is a valuable addition to your shop.


If you would like to make your own go here for lots of construction pictures and instructions.


sander


Image source


How To Make A 28" Wide Thickness Sander

Thursday, March 26, 2015

How To Make A Furniture Makers Tool Cabinet

Furniture And Cabinet Makers Tool Cabinets Can Be Quite Elegant Pieces


Carpenter and finish carpenter tool chests are quite different from a cabinet makers tool box because they had to be mobile, moving from job to job.


While furniture or cabinet makers stayed in the shop all the time.


So these cabinet makers tool chests often stood upright on a second base cabinet.


The door or doors on the upper tool cabinet usually were on the front opening out.


The insides of the doors themselves were surfaces to mount tools on.


Here is a video that walks you through building such a cabinet.


https://www.youtube.com/watch?v=Gxd8N6XT3Og


 Here are some other cabinet makers tool chests – go to Pg 2.


Next Page »


More Awesome Tool Chests


tool cabinet 1


Image Source


Tool Cabinet 2


Image Source


And on the next page are some even fancier tool cabinets.


Next Page »


Now These Cabinets Are Higher Quality


Cabinet makers tool cabinet


Image Source


Shop Cabinets


Image Source


How To Make A Furniture Makers Tool Cabinet

Thoughts On Machine Drive Belts

What Kind Of Drive Belts Do You Use?


There are a few different kinds of machine drive belts.


Some of the standard rubber belts are stiffer than others.


Sometimes you can use different width belts with the same set of pulleys.


And there are the link belts which are easy to adjust in length and easy to repair if a link gets damaged.


This video gives you a few thoughts on drive belts.


https://www.youtube.com/watch?v=Nc4Mt-O5tcQ


Thoughts On Machine Drive Belts

Need To Get Rid Of A Whole Bunch Of Wasps?

Make Yourself One Of These Wasp Sucking Machines


Large wasp nests can be hazardous to your health or anyone else’s health if they get too close.


Here is one mans ingenious way of catching wasps as they fly in and out of their nest.


Watch the video to see how he put this wasp sucker together.


https://www.youtube.com/watch?v=Gk52XA4rFpw


Wendle really likes sucking wasps so here’s his other sucker – on pg 2


Next Page »


Wasp sucking design no. 2


This design uses a big old fan with a boxed screen at the fan.


https://www.youtube.com/watch?v=OM4Nku2qAiI


The best mosquito trap ever - next page


Mosquito Catcher


Need To Get Rid Of A Whole Bunch Of Wasps?

Wednesday, March 25, 2015

Have You Seen These Portable Solar Generators?

This Is A Review On The Solar Max 3300 Portable Solar Generator


So what’s a portable solar generator?


It’s just what is says really. You have you batteries and all your electronics all mounted in a portable box and then you have a 230 watt separate solar panel with all the cables ready to plug and play.


In this video Engineer 775 Walks you through all the components and shows you what this baby is capable of.


https://www.youtube.com/watch?v=MhcZE_1RkDE


Have You Seen These Portable Solar Generators?

Tuesday, March 24, 2015

This Is A Staircase

The Tradesmen Sure Would Get A Lot Of Satisfaction Building A Fantastic Staircase Like This One


This article is going to walk you through the construction of this wonderful staircase.


There are a lot of pieces to fit and cut and a crew of experienced tradesmen to do the job.


This is the place they chose to start.


First Stringers in place


Curved Stringers


Now that the stringers are in place it’s time to move on to the next step — that starts on page 2


Next Page »


The Stringers Are In Place


The next step is to install the treads and risers.


This is an interesting stairs because not only do the stringers have than graceful curve.


The treads have a curved front nosing too, which looks very nice.


With the treads in place and posts under the landing the stair is now structurally sound to walk up and down on.


Treads and Risers


Landing and Cuved Treads


Now that the structure is in place, it’s time to add the trim. See the next page.


Next Page »


With The Stringers And Treads Nice And Solid It’s Time To Decorate The Stair


The finished stringer is made up of curved pieces as well.


What do you think of the finished look isn’t that gorgeous.


Working On The Finished Stringer


Finished Stringer


Now that the stair is finished it has to be made safe with a hand rail.


Check that out on the next page.


Next Page »


The handrail is an essential part of a stair


Curved handrails are tricky to make.


Now that the stringers are finished, they make a perfect form or template for gluing the handrail and holding it to the proper shape.


You need lots of clamps for this operation.


Have a look at how it’s done.


Making The Handrail


Lots of clamps


A Beautiful Rail


And for a look at a job well done go to the last page.


Next Page »


I Call This A Job Well Done


Pay attention to the newel posts at the bottom, the finish on the columns, the wainscoting at the landing and tho rail and trim around the opening on the upper floor.


Job Well Done


For more great pictures and commentary you have to check out the original article.


All the images were from the original article


This Is A Staircase

A Survival Item To Keep In Your Kit

Cutting Wood Is A Must In A Survival Situation


And you want the fastest way to cut that wood.


If all you have is a knife – that’s going to do the job but very slowly. A hatchet would be better. Better still would be a saw, but few have the room to carry one of those.


The Pocket Chain Saw


The item shown in this video is small compact and cuts quick — have a look and see.


https://www.youtube.com/watch?v=RaGLFR9VJ0M#t=71


A Survival Item To Keep In Your Kit

How To Have A Spider Free Home

5 Ways To Keep Those Pesky Spiders Out


Spiders are not my favorite creature. They may do a lot of good out in the garden. but the house is no place for spiders.


Lucky for us there lots of things that spiders don’t like that we can use to our advantage.


So let’s delve into ways to keep spiders out.


Anti Spider Method No. 1


Lady Bugs


Lady BugsYou don’t want them in your house either, but if you introduce them to the flower beds around the house they will keep the spiders away.


For the next tip go to page 2


Next Page »


Anti Spider Method No. 2


Clean Around The Perimeter Of Your Home


The perimeter of your home should be free of things like wood piles, trash and debris. Spiders will hang out in these and if they find a small entry, they will make their way into your home. If you have a fireplace and need a wood pile, make sure that this is several feet from your home.


No. 3 on the next page.


Next Page »


Anti Spider Method No. 3


Borax


BoraxBorax is most commonly used to keep ants out, but it helps to repel spiders too because it kills them if they get into it. Just sprinkle this in areas where spiders are coming in and setting up spiderwebs. You can also put this between your window and storm windows and along the thresholds of your doors.


On To No. 4 — Next page


Next Page »


Anti Spider Method No. 4


Check Your House For Cracks


For a spider to be in your home, they had to find a way in. Grab your caulking gun and head down into the basement to look for cracks and then seal them. You should repeat this around the foundation of your home, as well as at all windows and doorways.


No. 5 on the next page


Next Page »


Anti Spider Method No. 5


Natural Spider Spray


You can make your own spray and spray this in areas where spiders tend to congregate, such as the bathroom and other damp areas in your home. You should also spray it outside of your home along windows and doors so spiders do not want to enter. To make this spray, combine a cup of apple cider vinegar, a teaspoon of oil, one cup of pepper and a teaspoon of liquid soap. Put all of these in a spray bottle and mix well. Make sure to re-spray everything every couple of days and after it rains.


The original article has 9 more way to repel spiders - original article.


Image Source    Feature image source


How To Have A Spider Free Home

The Best DIY Mosquito Trap Ever

How Many Mosquitoes Can You Catch In An Hour?


If your not talking thousands you need this mosquito trap.


Are you ready to do battle with those pesky mosquitoes this summer?


What if I could show you a way to catch multiple times what those other mosquito traps you’ve been buying can catch?


On the next page there’s a video which will show you exactly how to do that.


Next Page »


The Best Mosquito Catcher Ever


All you need is an industrial fan, screening, some high strength magnets and some alcohol.


Watch the video to see how it’s done.


Later in the video you’ll also see the green solar method.


Have a look—


https://www.youtube.com/watch?v=pU2kbghz85I


The Best DIY Mosquito Trap Ever

Monday, March 23, 2015

Whole House Water Filter For Any Water Source

This is the filtering system which will handle water from a variety of sources such as springs, wells, cisterns etc.


The important thing is it won’t let you down when the power goes out like some filter systems because it does not require any power.


Watch this video to see how to install this multi filter system.


https://www.youtube.com/watch?v=bOlsDyGi5K8


Whole House Water Filter For Any Water Source

Sunday, March 22, 2015

A Pair Of Gorgeous Tables From Pallet Wood

Your Pallet Wood Creations Don’t Have To Look Like Pallets!


You can get a lot of good softwood and hardwood lumber from pallets.


The pieces will be short and the grade of the lumber will be low, but if you like the rustic look of a few knots you can use this wood to make quality furniture that doesn’t have to look like a pallet.


This pair of table are a great example. I love that scroll work at the bottom of the skirt boards.


To the maker of these tables I say well done.


side table


Pallet wood End Table


twin tables


For other great projects – check out the original website –


Images were from the original article


A Pair Of Gorgeous Tables From Pallet Wood

10 Ways To Keep Organized

Is Your Garage Or Basement A Mess Right Now?


Here’s a plan.


Pick away at that mess using one of these ideas one right after the other and maybe even a couple of ideas of your own until you are satisfies with the orderliness of your garage or basement.


Some of these projects are quick and others may take awhile just celebrate your victories along the way and keep going.


No. 1  Fasten an old bucket to the wall to hang your noses on.


You could also use a plastic pail. When there is a chance of the fasteners pulling through the bottom of the pail, cut out a circle of 3/4″ plywood, put it in the bottom of the pail and fasten through that.


Hose rack


On to way #2 on pg 2


Next Page »


No. 2 A Bicycle Rack Is Guaranteed To Save Space


Bike Rack


Next Page »


No. 3 Use Short Pieces Of PVC Pipe To Keep Your Gardening Tools In Order.


Garden tool rack


Next Page »


No. 4  Divided Containers Are Just The Thing For The Small Stuff


divided containers


Next Page »


No. 5  Use magnets To Organize Small Metal Tools


magnet organizer


Next Page »


No. 6  Build Your Own Cabinets


Build some cabinets


Next Page »

No. 7  Use That Old Trusty Peg Board

trusty pegboard


Next Page »


No. 8  Tin Cans Or Plastic Containers Work Great For The Small Stuff


tin cans for the small stuff


Next Page »


No. 9  Build A Wooden Storage Bin


build wooden bins


Next Page »


no. 10  Make Use Of The Space Over The Garage Door


over garage door


Back at the original article you will get an additional 10 ideas.


Images 1 – 9 are from the original article


10 Ways To Keep Organized

Have You Ever Cooked On A Rotisserie Fire Pit?

Well Here’s The Rotisserie Fire Pit That You Can Build In Your Back Yard.


Everyone cooks steaks and dogs on the BBQ, but what could you do with a great big easy to build rotisserie grill?


It’s an easy build. First decide if you want this a permanent installation using concrete base and mortared block work or you could just dry stack the block. That way you can load it up in your truck and move it to a new location – it really is that easy to set up.


The Rotisserie Grill


On the next page we’ll give you some instructions


Next Page »


Let’s Get Started


Here’s The Material List Of Stuff You Will Need


FOR THE BBQ BODY:


25 - – - – - 8″ x 8″ x 16″ standard blocks


15 - – - – - 8″ x 8″ x 16″ cap blocks (or standard)


4 - – - – - – 8″ x 8″ x 8″ half blocks


22 - – - – - 12″ x 12″ patio stones (optional)


4 to 8 - – -Wood/metal Stakes


- – - – - – Flagging tape or string


.


FOR THE PIT:


1 - – - – - -16′ x 12″ wide expanded steel (optional)


6 to 8 - – - 24″ rebar pieces (optional)


2 to 3 - – - Cubic feet of sand or gravel


2 - – - – - – -4′ x1.5″ metal pipe


.


FOR THE TOP / LID:


1 - – - – - – Food-grade steel drum


- – - – - – 20′ x 1.5″ angle iron (bed frames are great)


- – - – - – Wooden hockey stick


- – - – - – 5″ x 5/16″ bolts (with nuts & washers)


- – - – - – 2′ x 1/2″ threaded rod (with nuts & washers)


1 - – - – - – 7′ x 12″ (1/8″ thick) steel plate


1 - – - – - – High-heat flat-black BBQ spray paint


.


FOR THE GRILL (optional):


1 - – - – - – Expanded Steel 30″ x 48″


2 - – - – - – 1″ x 64″ Steel Pipe


.


We’ll Start With The Foundation on The Next Page


Next Page »


Choose the location for your grill


Then you need to lay out the 4′ by 7′  8″ dimensions of the grill.


Dig a hole about a foot deeper in the center for the fire pit.


Then start laying the blocks


The foundation


Rotisserie blocks


There will be a link to the detailed instructions and the original article  at the end.


The next page in this overview shows the metal pieces.


Next Page »


Here are the metal pieces being assembled.


As you’ll see there is a little bit of welding required here.


Metal Supports


The lid


Lid in place


For more images and detailed instruction they can be found in the original article


All the images are from the original article


Have You Ever Cooked On A Rotisserie Fire Pit?