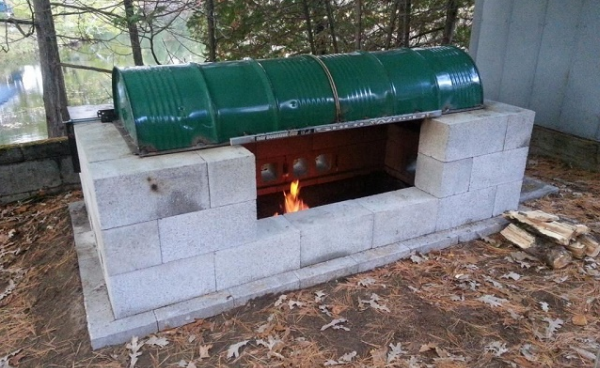
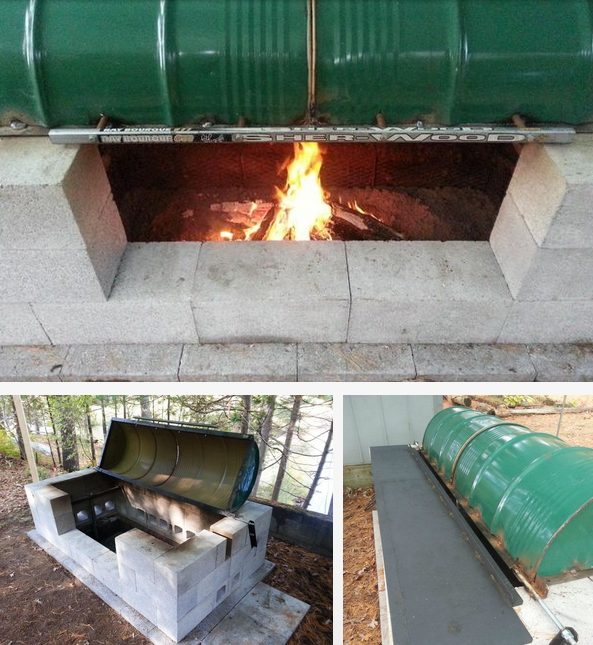
Well Here’s The Rotisserie Fire Pit That You Can Build In Your Back Yard.
Everyone cooks steaks and dogs on the BBQ, but what could you do with a great big easy to build rotisserie grill?
It’s an easy build. First decide if you want this a permanent installation using concrete base and mortared block work or you could just dry stack the block. That way you can load it up in your truck and move it to a new location – it really is that easy to set up.
On the next page we’ll give you some instructions
Next Page »
Let’s Get Started
Here’s The Material List Of Stuff You Will Need
FOR THE BBQ BODY:
25 - – - – - 8″ x 8″ x 16″ standard blocks
15 - – - – - 8″ x 8″ x 16″ cap blocks (or standard)
4 - – - – - – 8″ x 8″ x 8″ half blocks
22 - – - – - 12″ x 12″ patio stones (optional)
4 to 8 - – -Wood/metal Stakes
1 - – - – - – Flagging tape or string
.
FOR THE PIT:
1 - – - – - -16′ x 12″ wide expanded steel (optional)
6 to 8 - – - 24″ rebar pieces (optional)
2 to 3 - – - Cubic feet of sand or gravel
2 - – - – - – -4′ x1.5″ metal pipe
.
FOR THE TOP / LID:
1 - – - – - – Food-grade steel drum
1 - – - – - – 20′ x 1.5″ angle iron (bed frames are great)
1 - – - – - – Wooden hockey stick
4 - – - – - – 5″ x 5/16″ bolts (with nuts & washers)
2 - – - – - – 2′ x 1/2″ threaded rod (with nuts & washers)
1 - – - – - – 7′ x 12″ (1/8″ thick) steel plate
1 - – - – - – High-heat flat-black BBQ spray paint
.
FOR THE GRILL (optional):
1 - – - – - – Expanded Steel 30″ x 48″
2 - – - – - – 1″ x 64″ Steel Pipe
.
We’ll Start With The Foundation on The Next Page
Next Page »
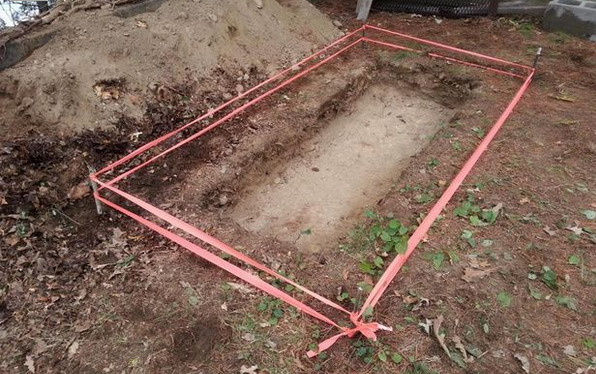
Choose the location for your grill
Then you need to lay out the 4′ by 7′ 8″ dimensions of the grill.
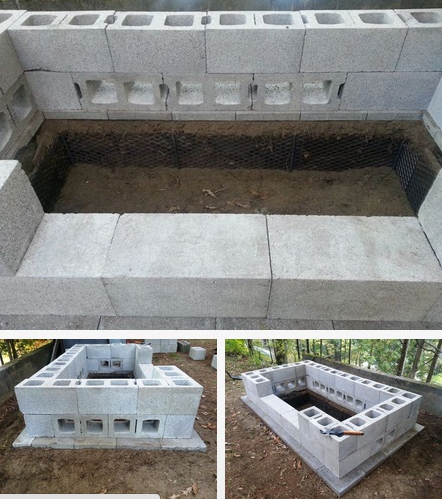
Dig a hole about a foot deeper in the center for the fire pit.
Then start laying the blocks
There will be a link to the detailed instructions and the original article at the end.
The next page in this overview shows the metal pieces.
Next Page »
Here are the metal pieces being assembled.
As you’ll see there is a little bit of welding required here.
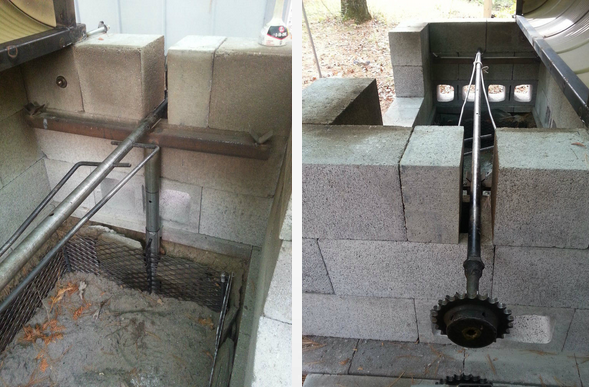

For more images and detailed instruction they can be found in the original article
All the images are from the original article
Have You Ever Cooked On A Rotisserie Fire Pit?
No comments:
Post a Comment